Packing List
- Camera x1
- Bracket x1
- Mounting Kit x1
- USB Charging Cable x1
- Operation Instruction x1
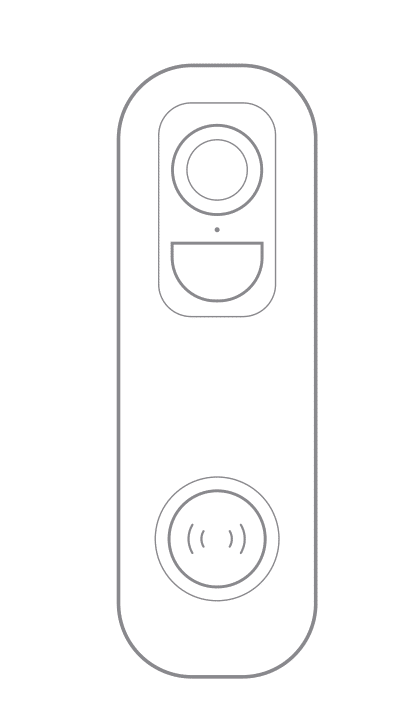
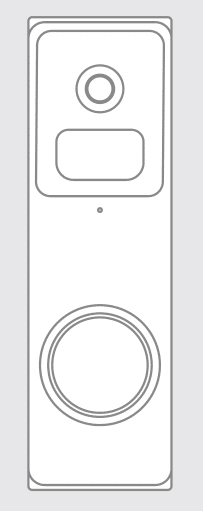
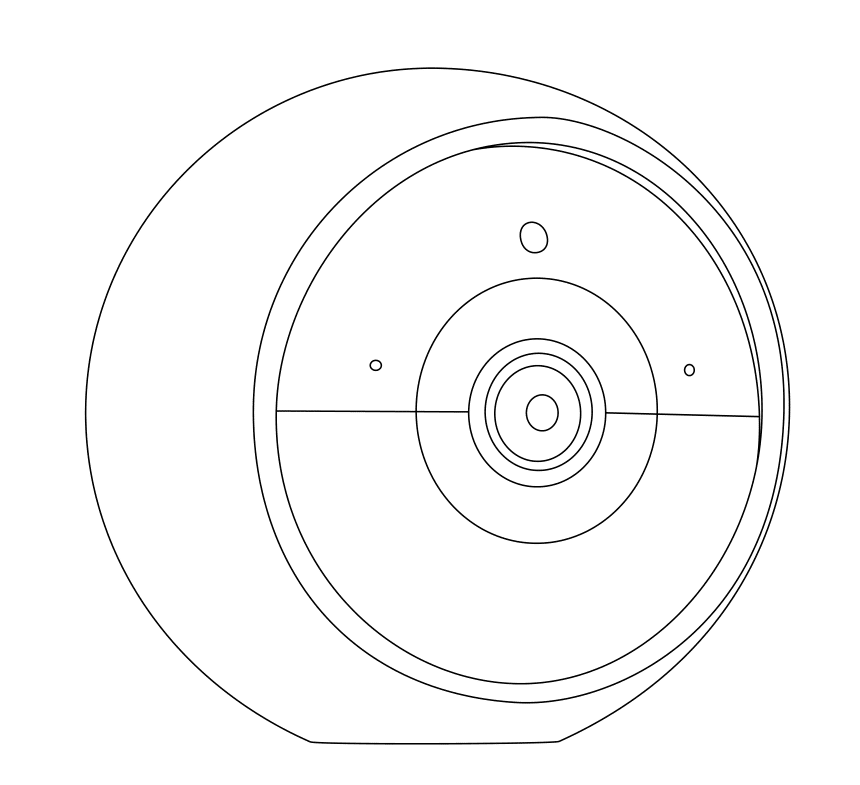
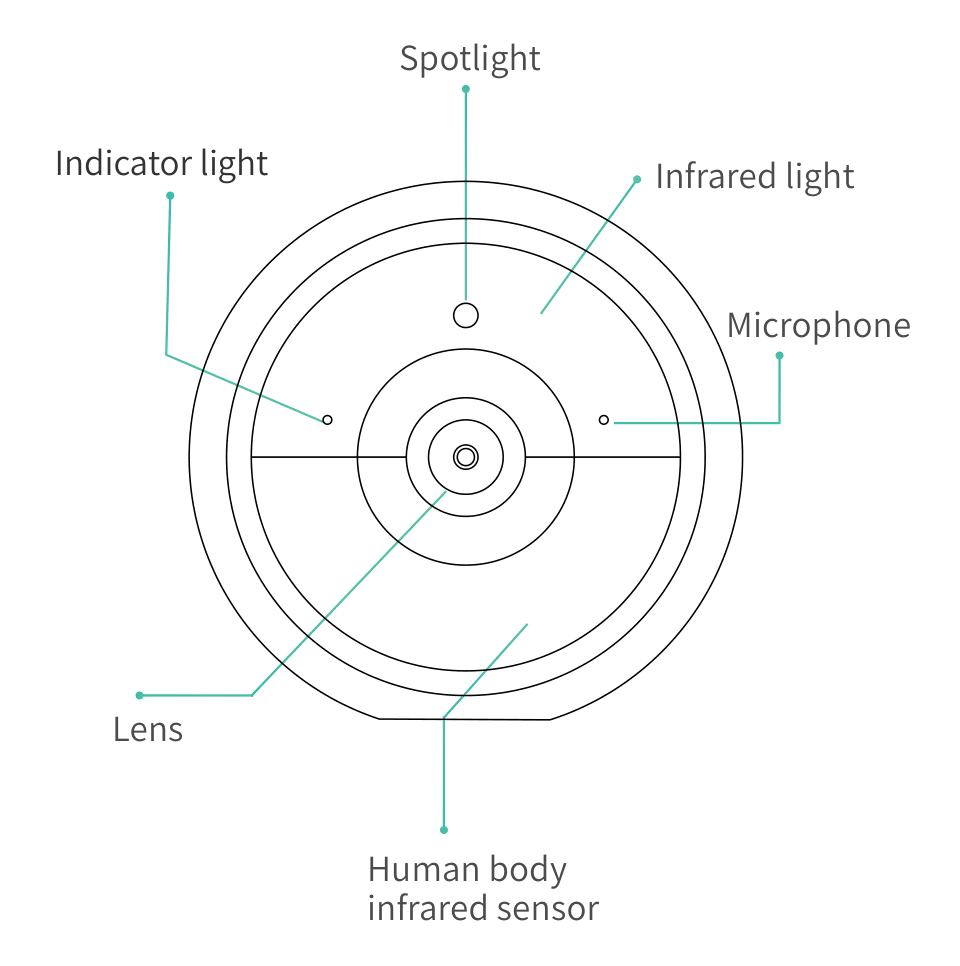
Product Appearance
Front:
- Infrared Light
- Lens
- Spotlight
- Indicator Light
- Human Body Infrared Sensor
- Microphone
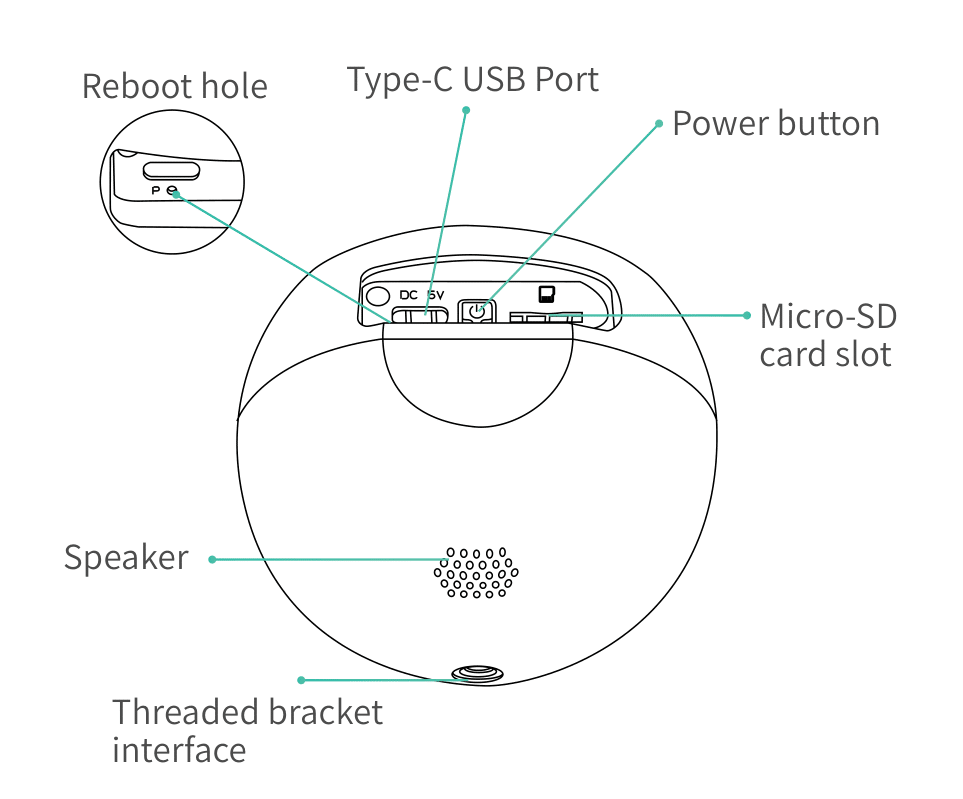
Back:
- Threaded Bracket Interface
- Speaker
- Power Button
- Reboot Hole
- Type-C USB Port
- Micro-SD Card Slot
Quick Start
1. Download and Install the App:
The camera supports Android and iOS app. For your best experience, please download and install the app with your mobile phone as instructed below, and complete the user registration process in the app.
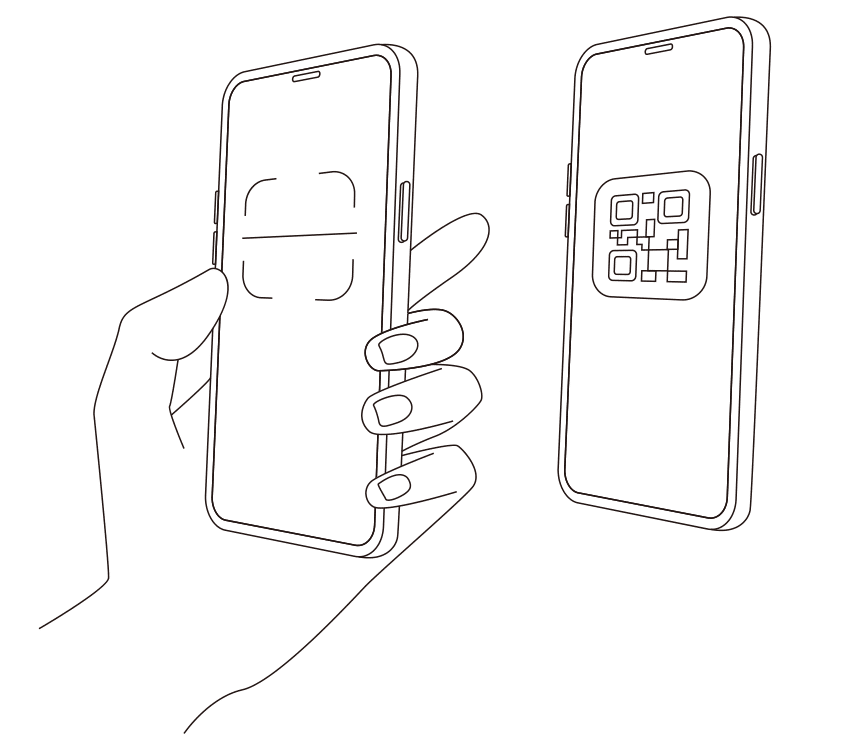
a) Go to the following link in your system browser to download:https://vicohome.app/download/
OR
b) Scan the QR code to go to the link:
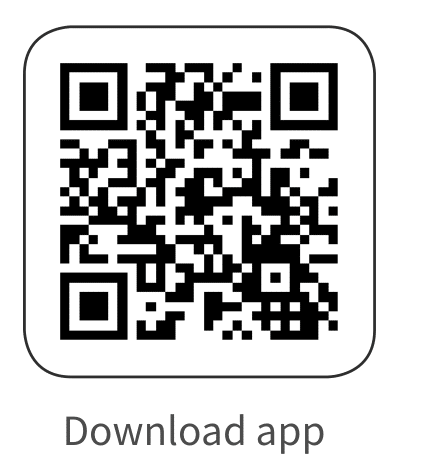
CAUTION:
DO NOT use 3rd party QR code scanning tool or app to avoid scam or malware. Use QR code scanning app provided by your mobile phone system, e.g., the system camera app.
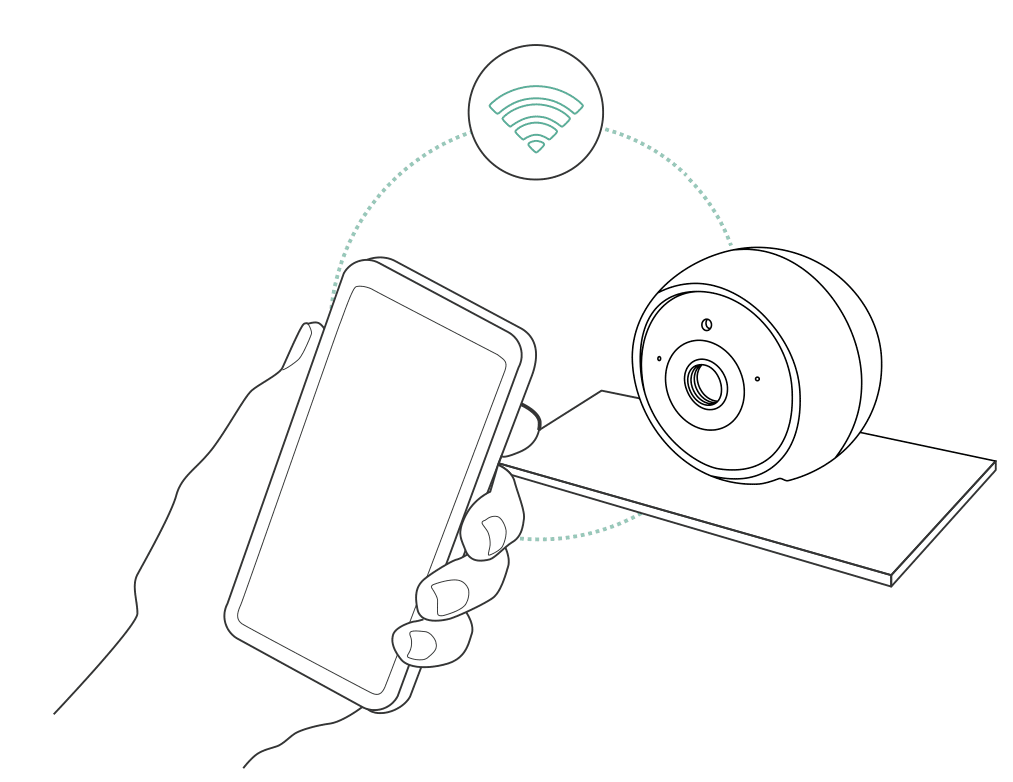
2. Add the Device
Sign in to the app, connect to Wi-Fi, and add the device according to the prompts (please bring the device close to the router when configuring).
Power On/Off and Network Configuration
- Long press the power button for 3 seconds to power on/off the device.
- Double click the power button to enter the network configuration mode after the prompt tone.
Note: When connecting the camera for the first time, use the app and follow the instruction to configure the camera network.
Bind the Camera
- Add the Camera:
- Click the “Add Now” button in the app, press and hold the camera switch button for 3 seconds to turn on the camera, and the app will automatically search for devices that are on and not bound. Select the device you want to bind in the search results for the next step.

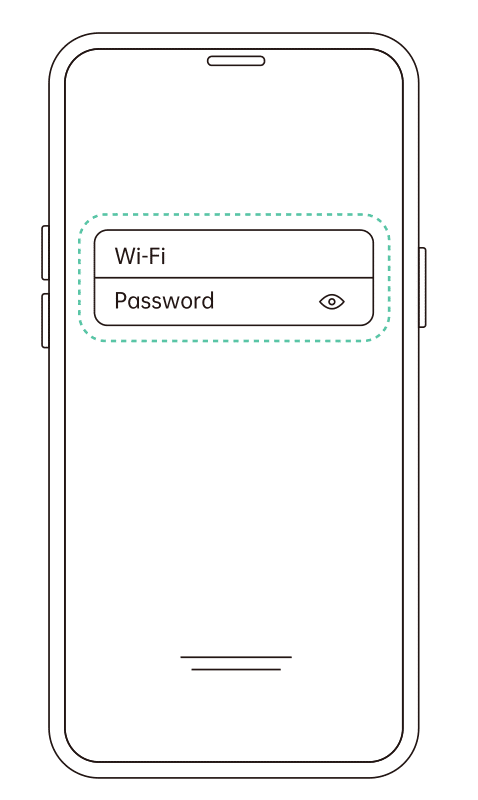
- Enter Wi-Fi Credentials:
- Enter the name and password of the Wi-Fi network you want the camera to connect to. To ensure long-distance connection, the camera only supports 2.4GHz WiFi network with stronger wall penetration capability and does not support Wi-Fi with enterprise-level authentication. Please make sure that the Wi-Fi meets the requirements, click Next after completion, and the app can try to connect the camera to the Wi-Fi.
- Complete the Pairing:
- After a while, the camera will play a sound indicating that the connection is successful. At this point, please set a name for the camera on the app and select the location where you want to place the camera. Click Finish to complete the pairing.
Possible Problems with Binding
- Wi-Fi Password Error: Please check whether the Wi-Fi password you entered in the app is correct.
- Authentication Error: Ensure that your Wi-Fi network is not an enterprise-level network, and the device supports only networks with the security level below WPA-2.
- Wi-Fi Not Found: Verify that you select or enter the correct Wi-Fi name, place the device near the Wi-Fi router, and ensure that the router is powered on. Note that 5GHz Wi-Fi cannot be searched by the device.
- Retrieving IP Timeout: The number of devices connected to the router may be too many. Remove some of the connected devices that are not commonly used or restart the router to clear unconnected devices. Contact the router administrator if needed.
- Cloud Service Connection Fail: Check if your router is properly connected to the external network. This error commonly occurs due to network disconnection or when the selected router in your home is a local area network server. Ensure the network connection is normal, and try to temporarily turn off the firewall to connect again.
Install the Camera
You can place the camera on a shelf or other surfaces to use, or you can install it on a wall to use.
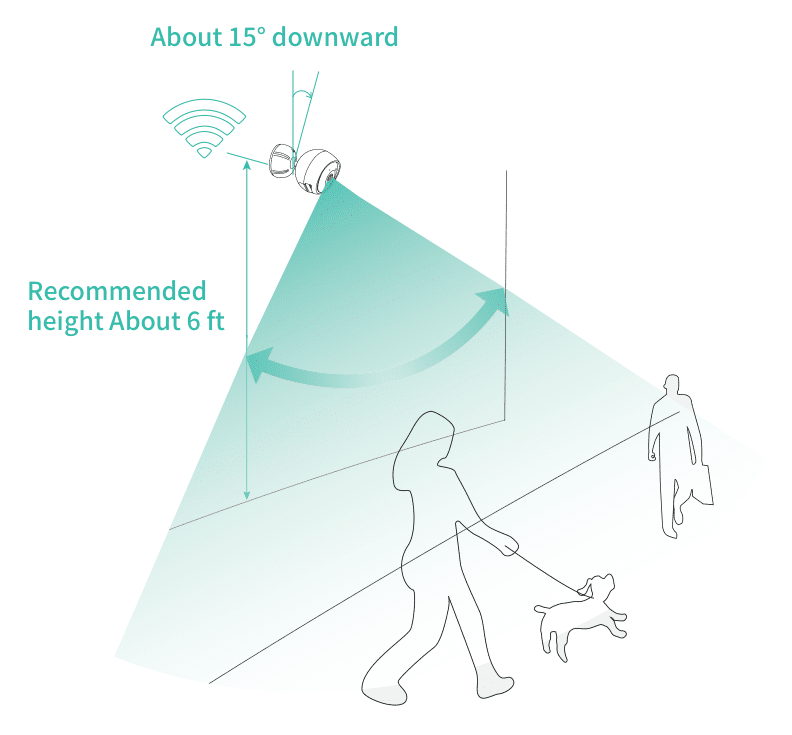
1. Select a Good Spot for Your Camera
Select a good spot for your camera. Please install the camera in a position where its view is not blocked and ensure that it is within the coverage of the Wi-Fi network. The PIR infrared sensor is more sensitive to movements across the camera’s field of view than movements toward or away from the camera.
2. Install the Bracket
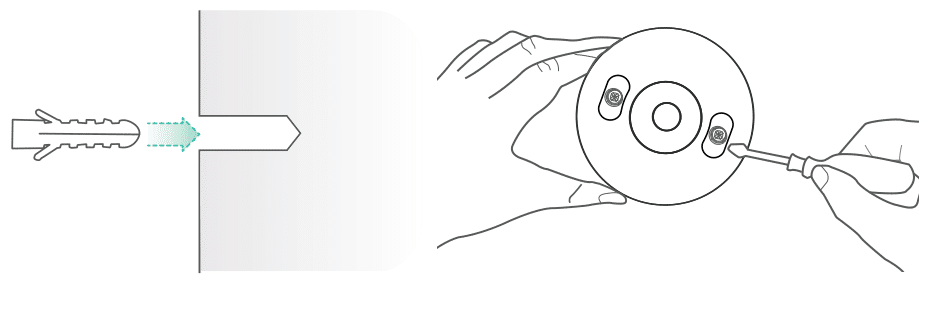
- Screw Fixing:
- Use a drilling tool to punch holes on the wall according to the hole distance of the base. It is recommended to mark the holes on the wall with a pencil before drilling. Screw the expansion nut into the holes on the wall, and then connect the bracket to the expansion nut with screws to complete the fixing.
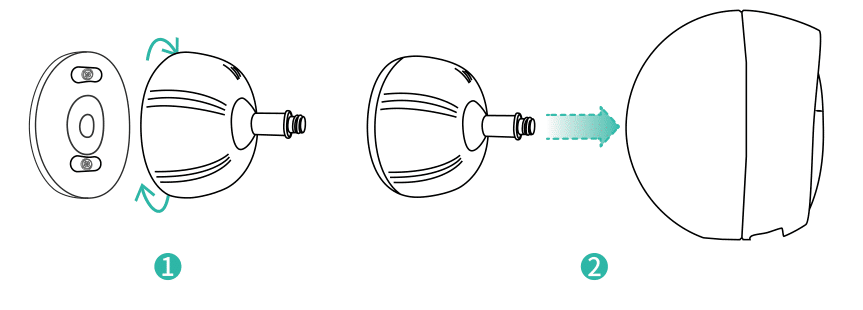
- Fix the Camera:
- Install the bracket cover to the bracket base. Then align the bracket screw with the screw hole on the back or bottom of the camera, and then rotate it to the tightened state.
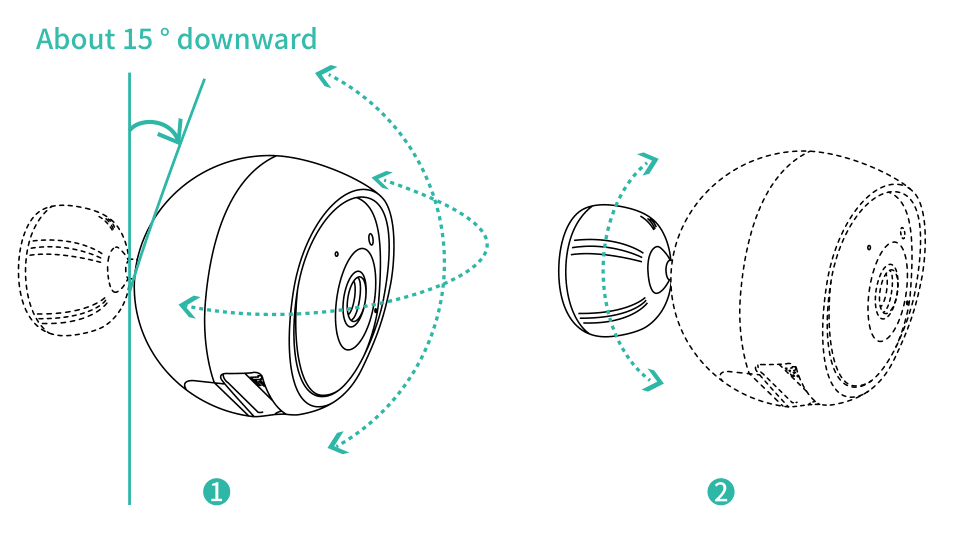
3. Adjust the Angle
Adjust the camera to an appropriate angle, the best angle is about 15 degrees downward, and then tighten the base by rotating it in a clockwise direction to fix the angle.
Share the Camera
You can use this feature when you need to use the camera with other family members or friends. Only the admin user who has bound the camera for the first time can share and set up the camera, while other members can only view the live video or video playback of the camera.
Steps to Share the Camera
- For Admin User:
- Find the camera you wish to share on the app homepage or camera settings screen, then click the share button and enter the Share page. Click “Device Sharing” to generate a shared QR code.
- For Users to be Shared With:
- Click “+” on the homepage and select “Add Friend’s Device” to enter the scan code page.
- Complete the Sharing:
- After the shared user successfully scans the QR code on the admin user’s mobile phone, the admin user will receive a confirmation notification and then click “Accept” to complete the camera sharing.
Charge the Camera
The app will remind you to charge your camera when the battery is low. Please use the Type-C USB cable to plug into the 5V/1.5A charging adapter to charge the camera. During charging, the camera’s indicator light is solid yellow, and when the camera is fully charged, the indicator light will turn solid green. It will take 10 hours to fully charge the camera.
Indicator Light Status
| Mode | Status |
|---|---|
| Working mode | Blue |
| Sleep mode | Off |
| Charging mode | Yellow |
| Fully charged mode | Green |
Product Specification
| Item | Specification |
|---|---|
| Camera lens | Field of view: 127° |
| Image resolution | Max. 2304 × 1296 |
| Video bit rate | Adaptive |
| Storage media | Micro SD card (Up to 128GB) |
| Battery capacity | 5200mAh |
| Adapter requirement | 5V/1.5A |
| Size | 3.353.352.80 inches |
Firmware Upgrade
When you connect your camera through the app, it will prompt you if the latest firmware is available. You can also manually check the firmware upgrade in the settings of the app.
Note: Please make sure that your camera is fully charged or connected to the power adapter before upgrading the firmware. Do not cut off the power supply during the upgrading.
FCC Warning
This device complies with part 15 of the FCC Rules. Operation is subject to the following two conditions:
- This device may not cause harmful interference.
- This device must accept any interference received, including interference that may cause undesired operation.
Any changes or modifications not expressly approved by the party responsible for compliance could void the user’s authority to operate the equipment.
Note: This equipment has been tested and found to comply with the limits for a Class B digital device, pursuant to Part 15 of the FCC Rules. These limits are designed to provide reasonable protection against harmful interference in a residential installation. This equipment generates, uses, and can radiate radio frequency energy, and, if not installed and used in accordance with the instructions, may cause harmful interference to radio communications. However, there is no guarantee that interference will not occur in a particular installation. If this equipment does cause harmful interference to radio or television reception, which can be determined by turning the equipment off and on, the user is encouraged to try to correct the interference by one or more of the following measures:
- Reorient or relocate the receiving antenna.
- Increase the separation between the equipment and receiver.
- Connect the equipment into an outlet on a circuit different from that to which the receiver is connected.
- Consult the dealer or an experienced radio/TV technician for help.
To maintain compliance with FCC’s RF Exposure guidelines, this equipment should be installed and operated with a minimum distance between 20cm from the radiator to your body. Use only the supplied antenna.
FAQ
- Q: Camera permission management: How to invite family and friends to use my camera together?
- A: Open the app and select your camera on the home page. Click the share button on the home page or the “Share” in the camera settings to enter the sharing page, and then click “Invite” to generate a QR code. Your friends can now get some of the access rights by scanning the QR code in your phone.
- Q: Why doesn’t the Wi-Fi name appear when I connect to Wi-Fi?
- A: On Apple devices with iOS13 and above, you need to turn on the “location permission” for the app in the system settings and change it to “allow when using.”
- Q: Will the camera show red lights when night vision is activated?
- A: The built-in infrared lamp beads make the camera only show some dim red lights when night vision is activated, but the image quality is still clear under no light environment.
- Q: What are the requirements for Wi-Fi?
- A: Please use a 2.4GHz wireless network. The device does not support the 5GHz wireless network. Meanwhile, please set the Wi-Fi authentication method to WPA2-PSK or other lower levels of security method. A password is required.
- Q: How far should the camera be placed from the router?
- A: After testing, the Wi-Fi connection distance can normally reach up to 150 meters in an open area. However, the actual situation depends on the strength of Wi-Fi and its surrounding environment (thick walls, electromagnetic devices, and large metal objects will all cause interference with the Wi-Fi signals). If the camera connection signal is weak or unstable, please place the camera as close to the router as possible.
- Q: How to quickly view videos by category?
- A: Click the icon in the upper left corner of the “Library” page to start filtering videos by category. Select the category you want to see and then click “Save” to view the video playbacks.
- Q: What should I do when the device is malfunctioning?
- A: Long press the power button for 3 seconds to restart it. If there is no response, you can remove the rubber plug at the bottom of the camera. Press the reboot hole with a pointed object to restart the camera.