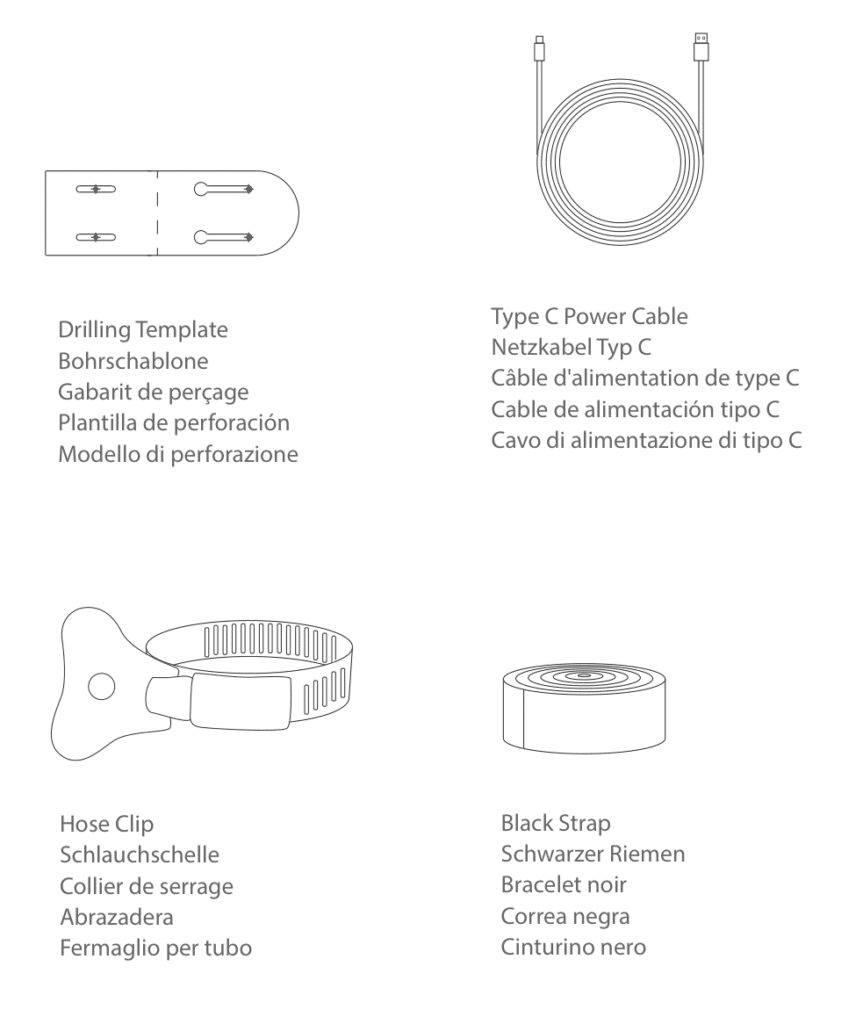
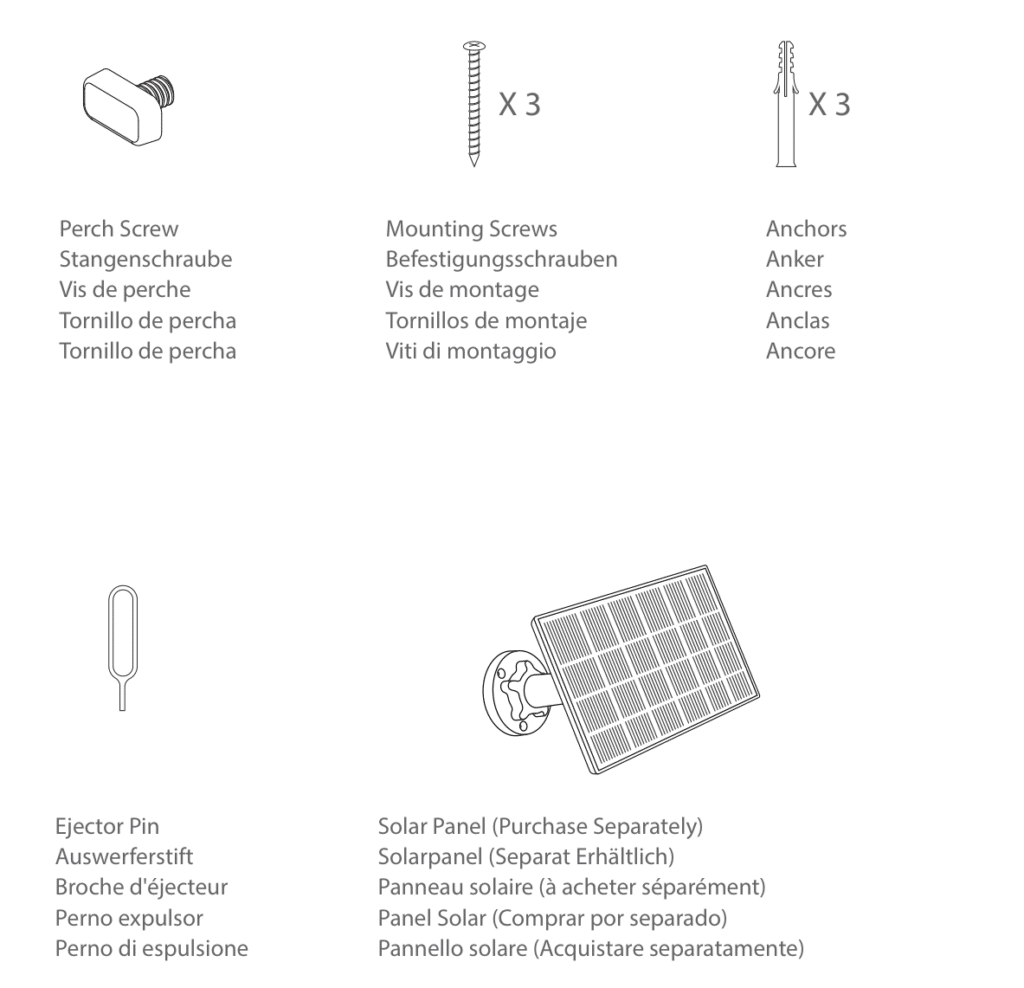
What’s In The Box

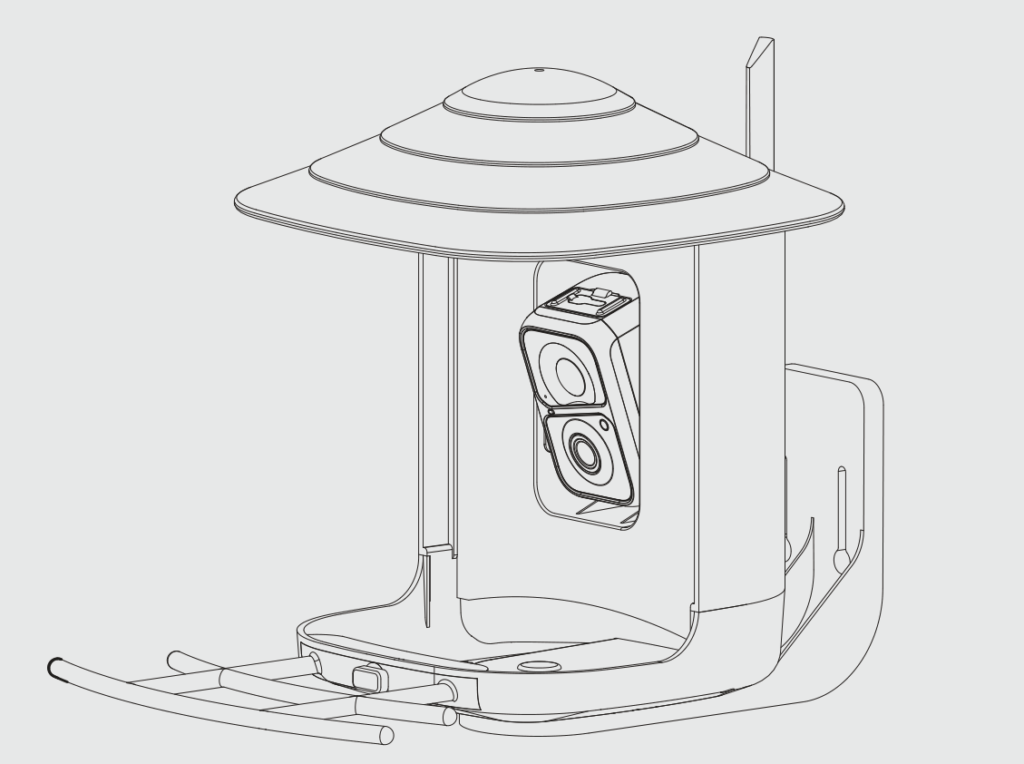
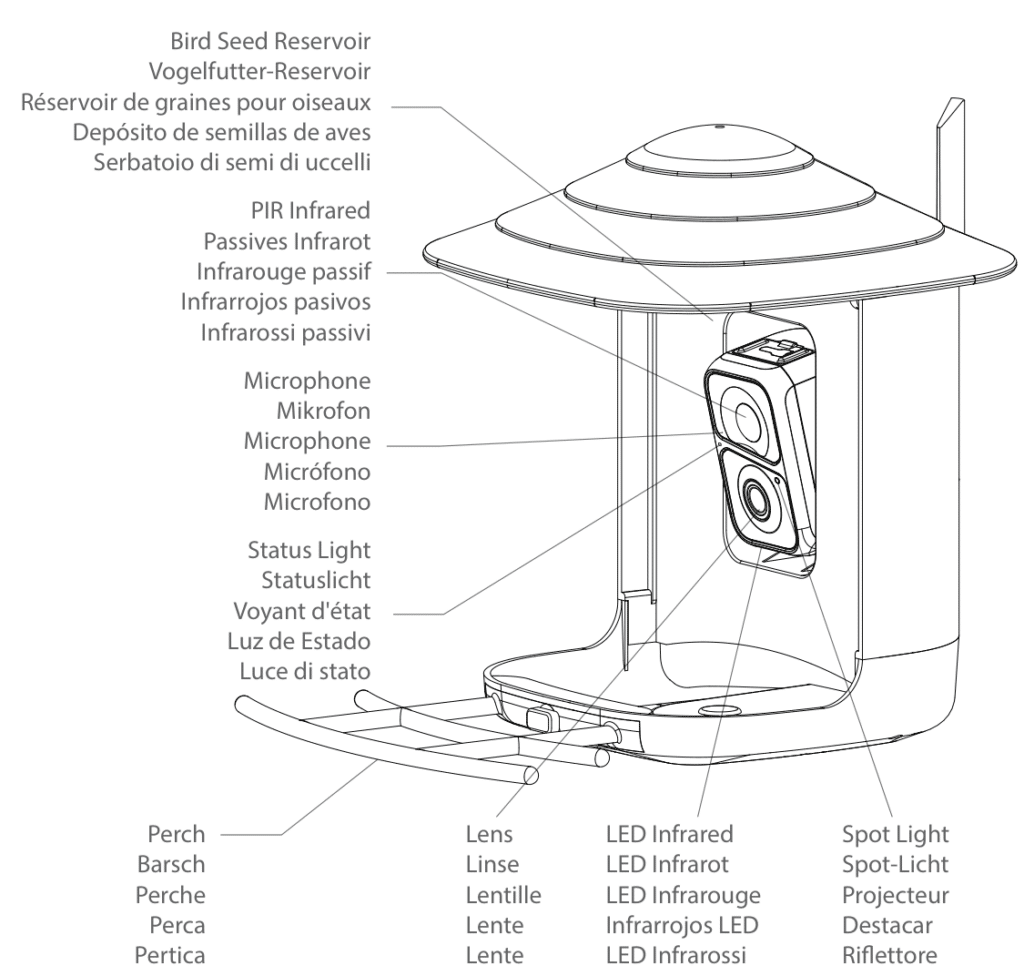
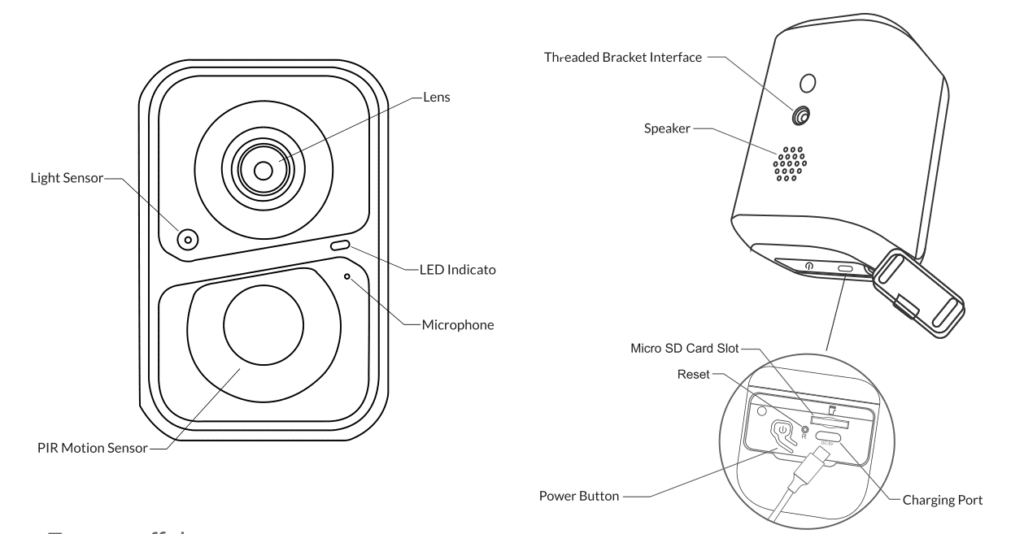
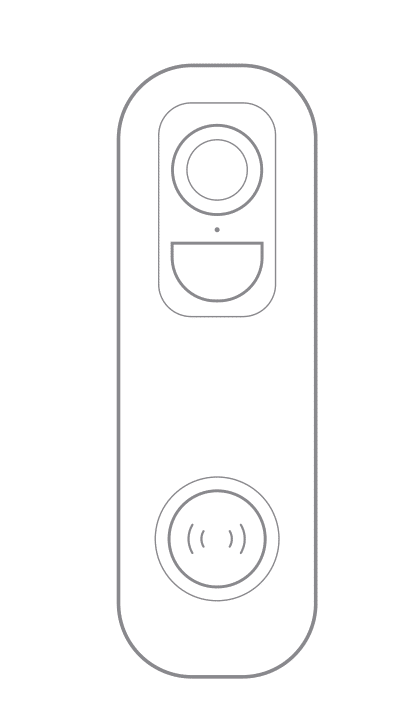
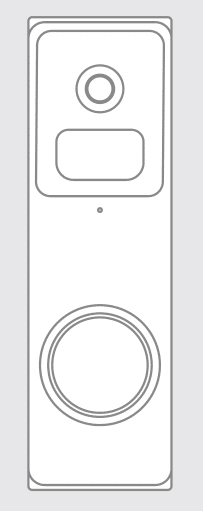
Camera Structure
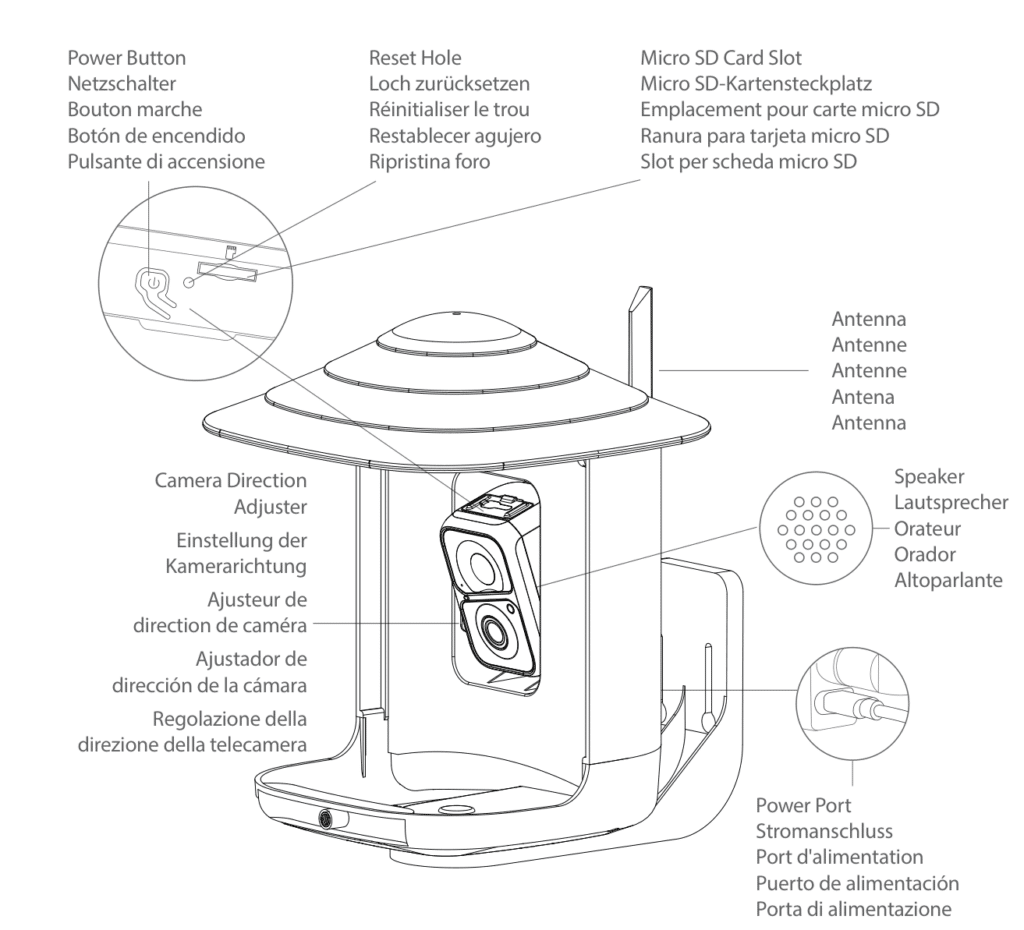
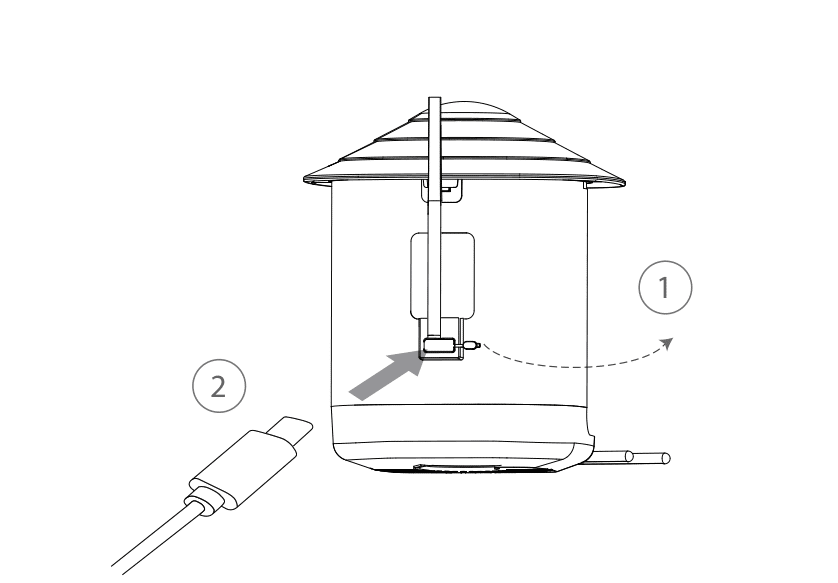
Insert Micro SD Card
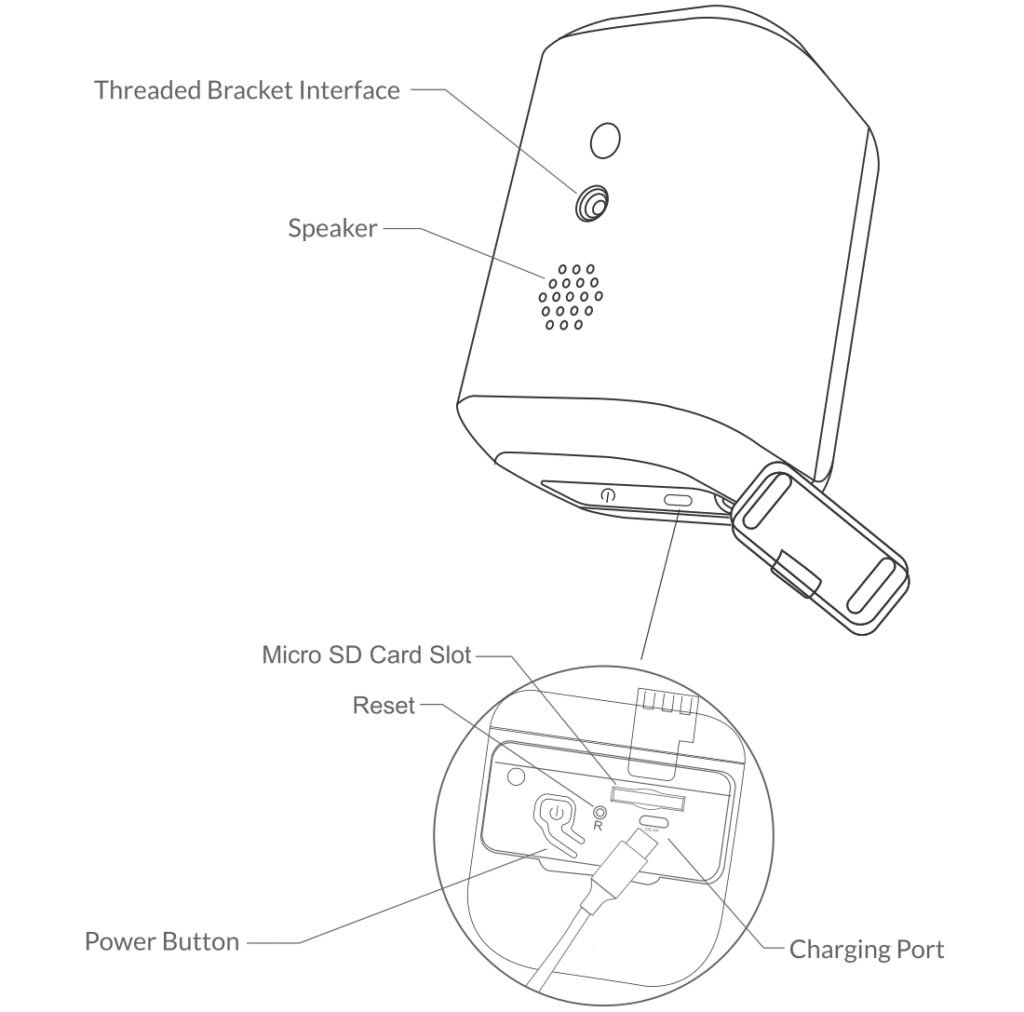
Bird Cam comes with a built-in card slot that supports up to 128GB Micro SD card.
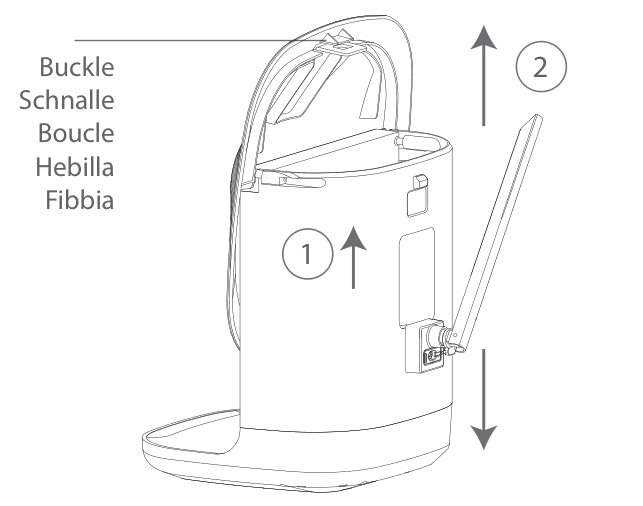
Step 1: Rotate the camera down to the bottom.
Step 2: Open the top silicone plug. Insert the Micro SD card. Make sure to plug it in the right direction.
Step 3: Finally, Cover the silicone plug.
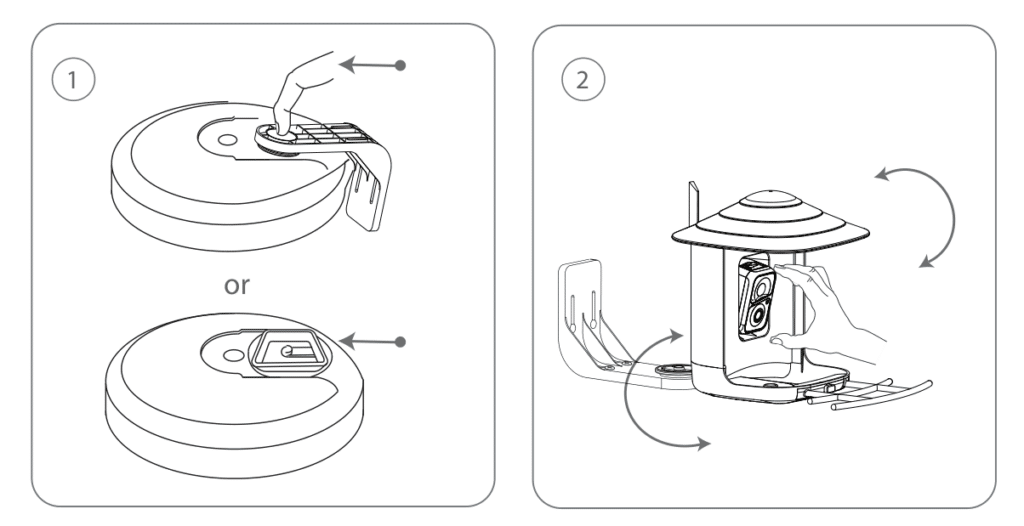
Assemble Bird Feeder
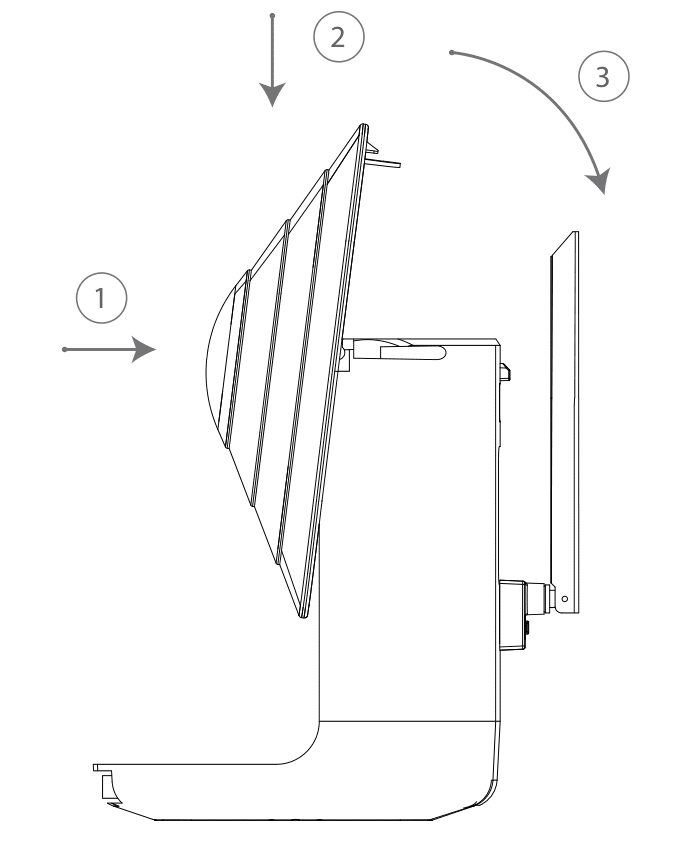
Assemble the roof
Step 1: Face up the side of the roof with the buckles. Align the small pillar on both the left and the
On the right side with the buckles of the white bird seed container.
Step 2: Push down to insert.
Step 3: Then rotate back to install the buckle behind the white birdseed container.
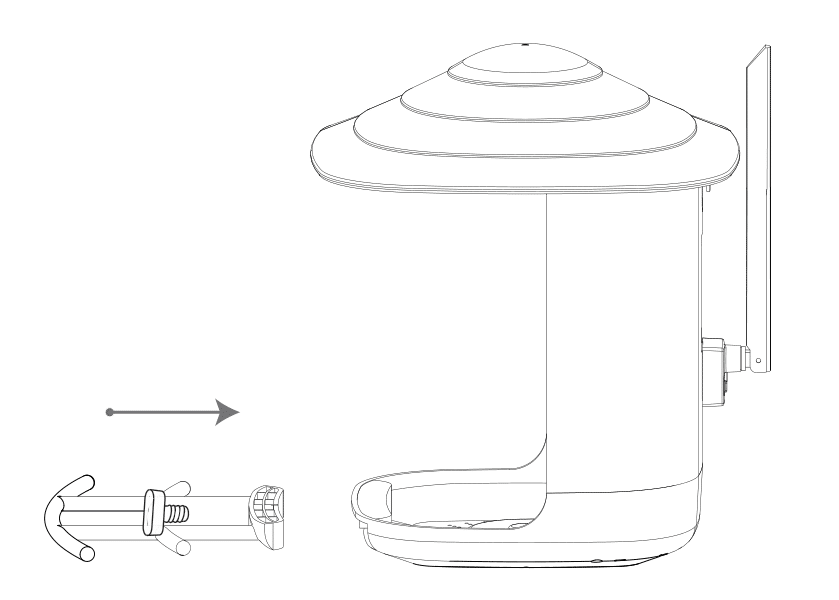
Assemble Perch
Use the provided perch screw to install the perch.
Battery Charging
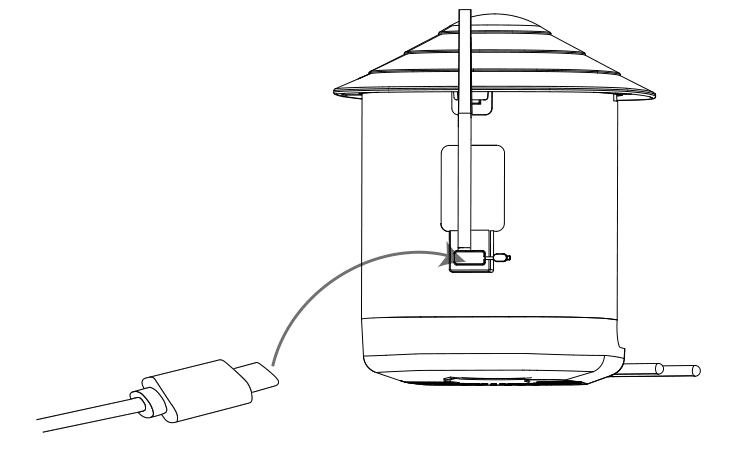
The batteries inside the camera are not fully charged according to transportation safety regulations. Please fully charge the camera before using it. Please charge the batteries using the provided Type C Port Cable (DC5V / 1.5A adapter not included).
The status light will be solid yellow when charging and will turn to solid green when it is fully charged. It takes about 14 hours to fully charge your camera.
How To Turn On & Of The Camera
To turn on the camera:
Long press the power button for 3s to turn on the camera. Then, the Status Light in the front of the camera will be solid blue. Double-click the power button to enter WiFi mode after the prompt tone.
To turn of the camera:
Long press the power button for 3s to turn off the camera. Then, the Status Light in the front of the camera will be off.
Read Before Installation
- Keep Bird Feeder and all accessories out of reach of children and pets.
- Make sure the camera has been fully charged (DC5V / 1.5A).
- Working temperature: -10°C to 50°C (14°F to 122°F) Working relative humidity: 0-95%
- Please do not expose the camera lens to direct sunlight.
- The camera has an IP65 waterproof rating, which supports working properly under rains or snows. But it cannot be soaked in water.
Note:
- Bird Feeder Cam only works with 2.4GHz Wi-Fi.
- Strong lights may interfere with the device’s ability to scan QR code.
- Avoid placing the device behind furniture or near microwaves products. Try to keep it within range of your Wi-Fi signal.
Set Up With Vicohome App

Download VicoHome App
- Available on the App Store or Google Play.
- Alternatively, download the App by scanning the QR code above with the QR code scanner in your smartphone.
Installation
Before you drill holes on your wall, ensure the following:
- The Bird Feeder Cam has been successfully added to your VicoHome App and is able to stream video.
Wall Installation:
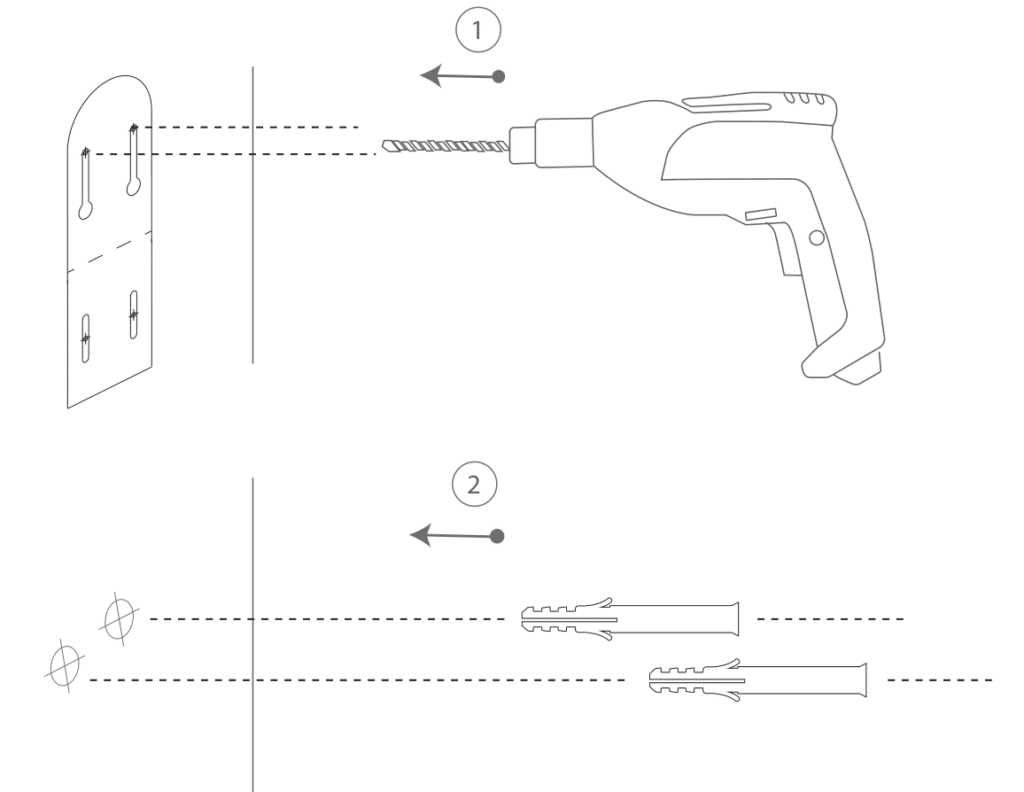

Step 1: Installation
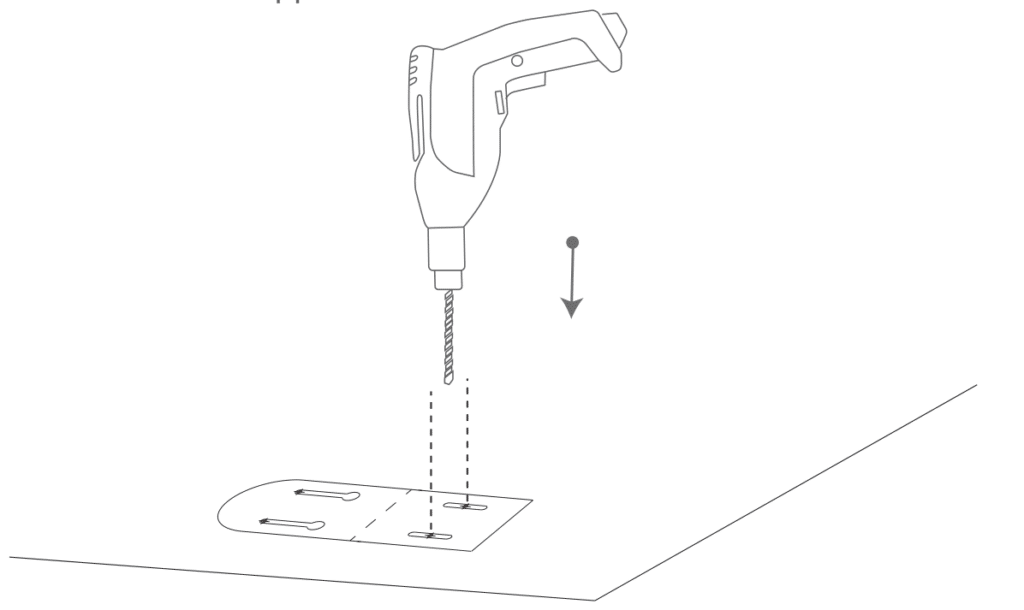
- Use the provided drilling template to mark the position of holes on your wall. Use a drill bit (5/16″, 8mm) to drill two holes.
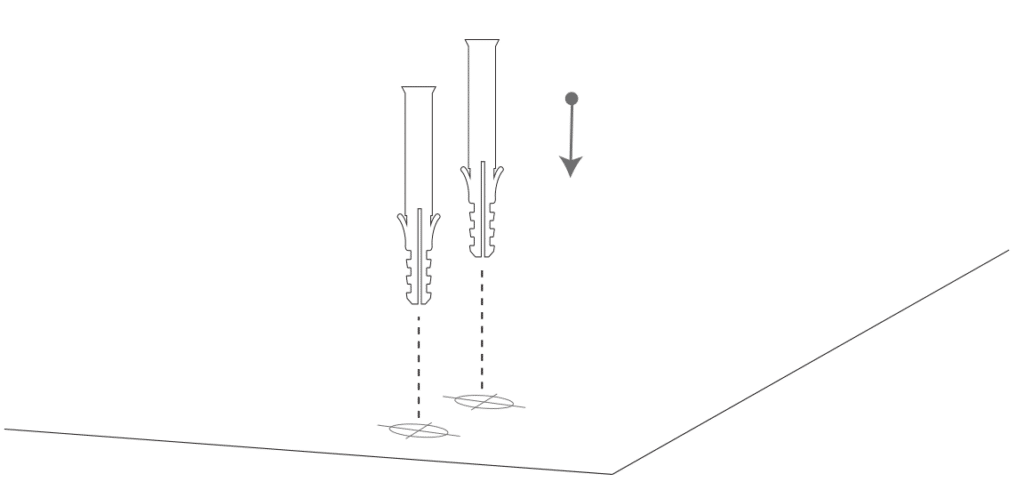
- Install the anchors to fix the screws. (If installing on wood, skip this step.)
- Install the Mounting Bracket on your wall with the screws provided.
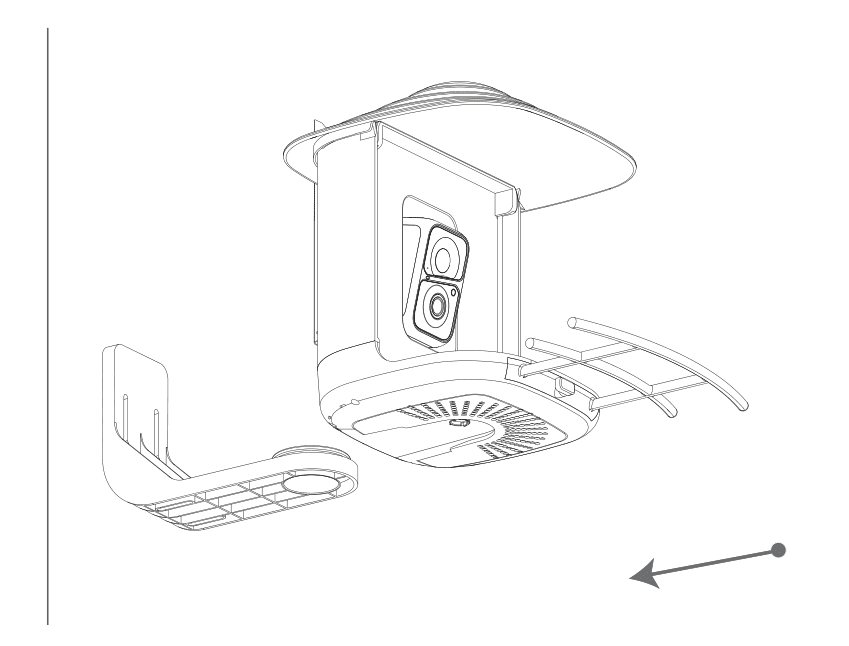
Step 2:
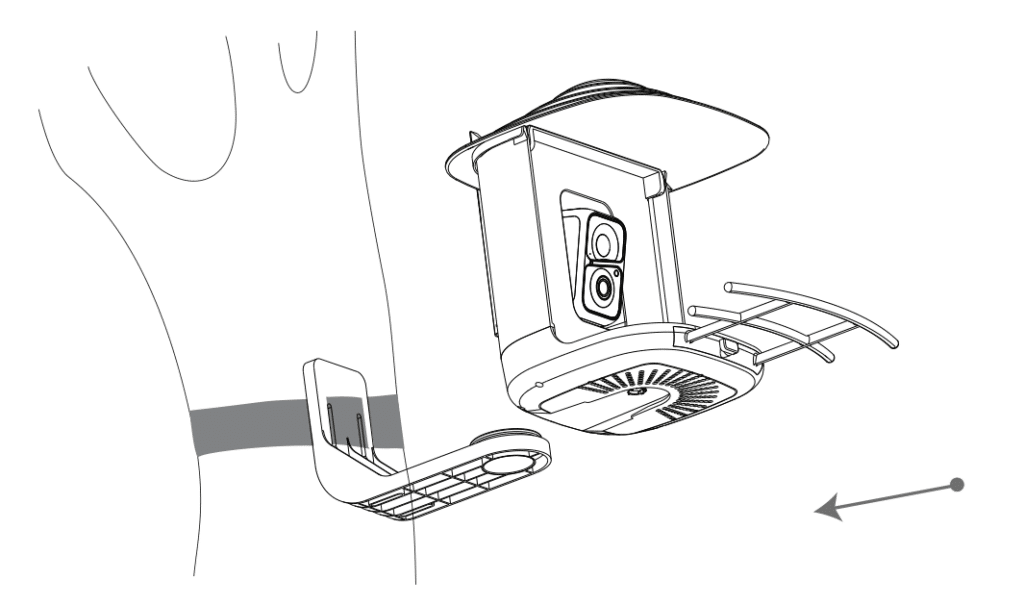
Slide the Bird Feeder into the bracket through the slide rail.
Tree Installation:
Step 1: Wrap the Mounting Bracket around the tree with the Black Strap.
Step 2: Slide the Bird Feeder into the mounting bracket.
Stand Installation:
Step 1: Placement and Installation
- The Bird Feeder can be placed steadily on a flat surface; however, for enhanced stability, we recommend installing and fixing the backplane on a flat surface.
- Use the provided drilling template to mark the position of holes on the flat surface. Use a drill bit (5/16″, 8mm) to drill two holes.
Step 2:
Install the anchors to fx the screws. (Install on wood skip this step.)
Step 3:
Install the Mounting Bracket on fat surface with the screws provided.
Step 4: Slide the Bird Feeder into the mounting bracket.
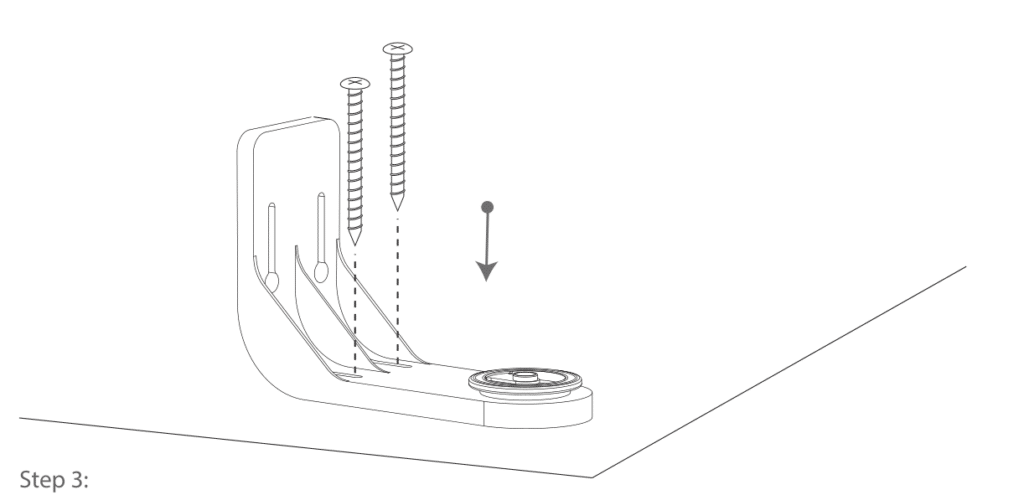
Tripod Installation:
Installation Guidelines
Important Note:
- Ensure that the bracket is not installed on the bottom of the Bird Feeder. If you need to remove it, please refer to “Step 2 of Cleaning Bird Feeder” for instructions on how to remove the bracket.
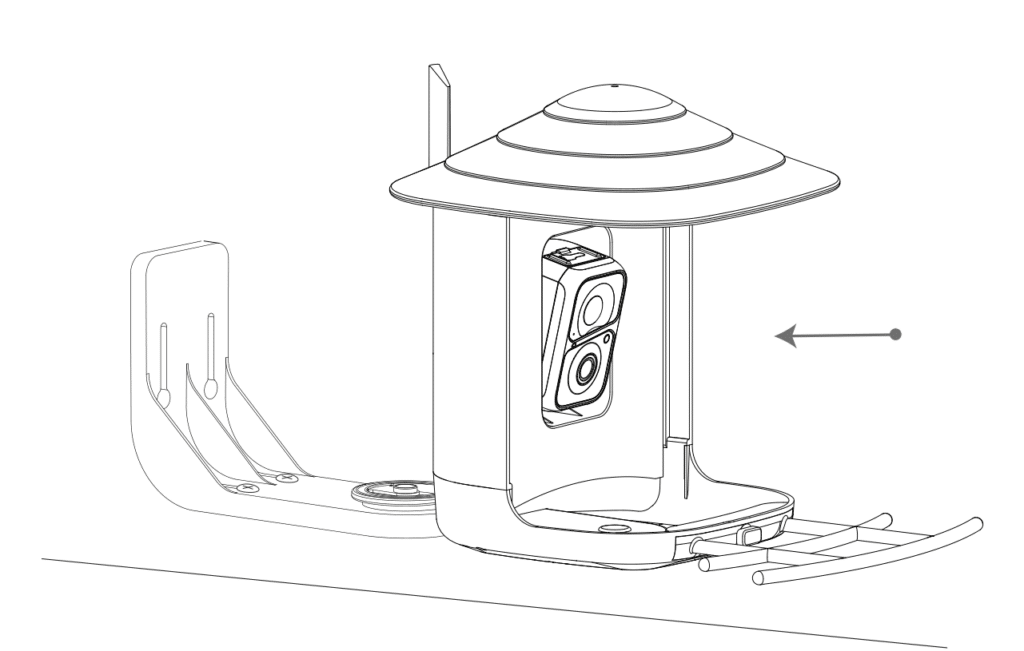
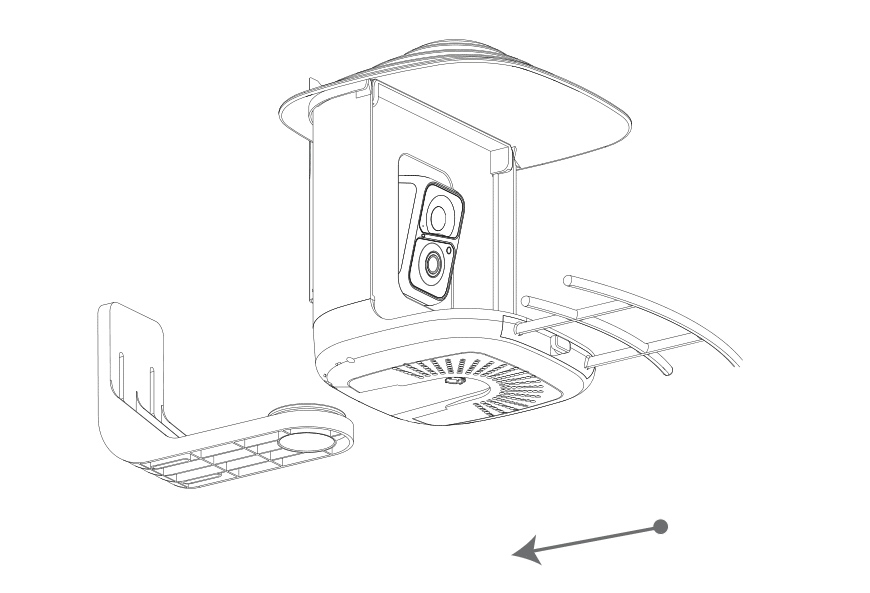
Step 1:
- Slide the Bird Feeder into the Tripod Adapter.
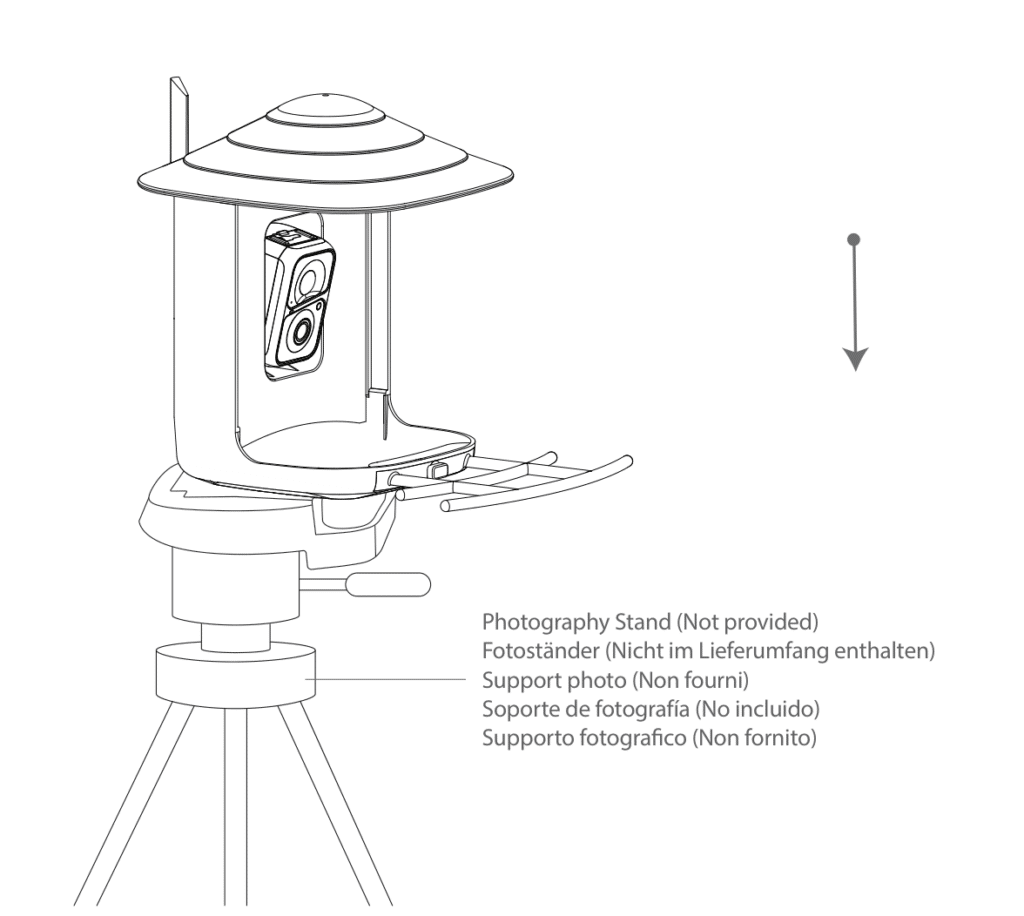
Step 2:
Install the Bird Feeder on the corresponding accessories, such as a photography stand (not provided).
Pole Installation – Hose clip
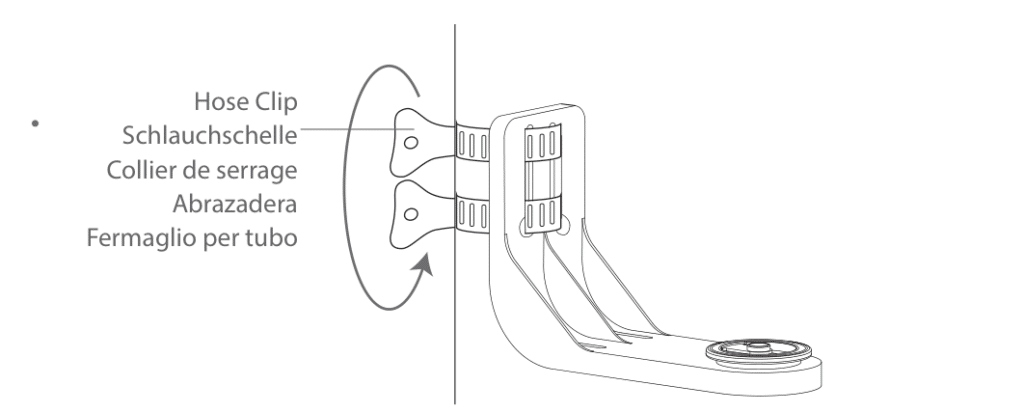
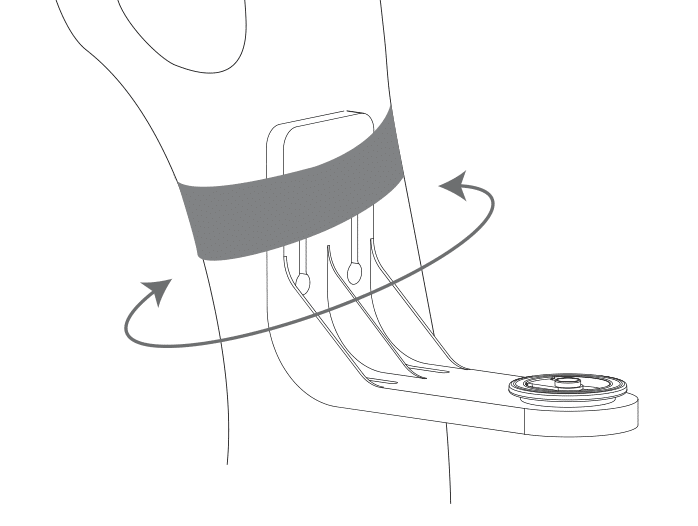
Step 1: Attach the Bird Feeder to the pole with the Hose Clip, turning the handle clockwise.
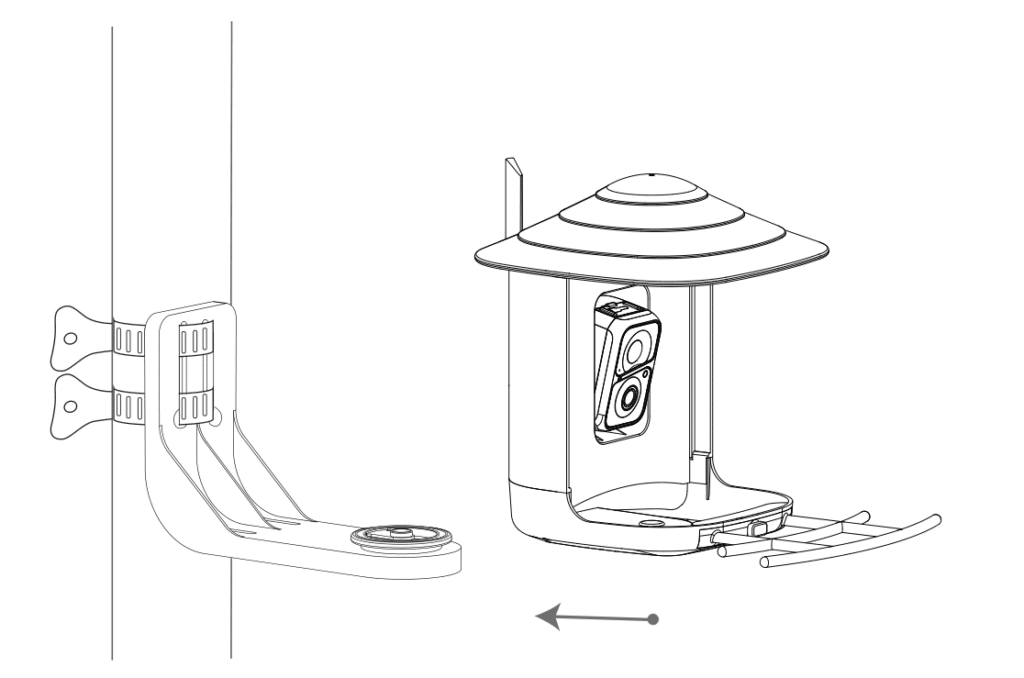
Step 2: Slide the Bird Feeder into the bracket through the slide rail.
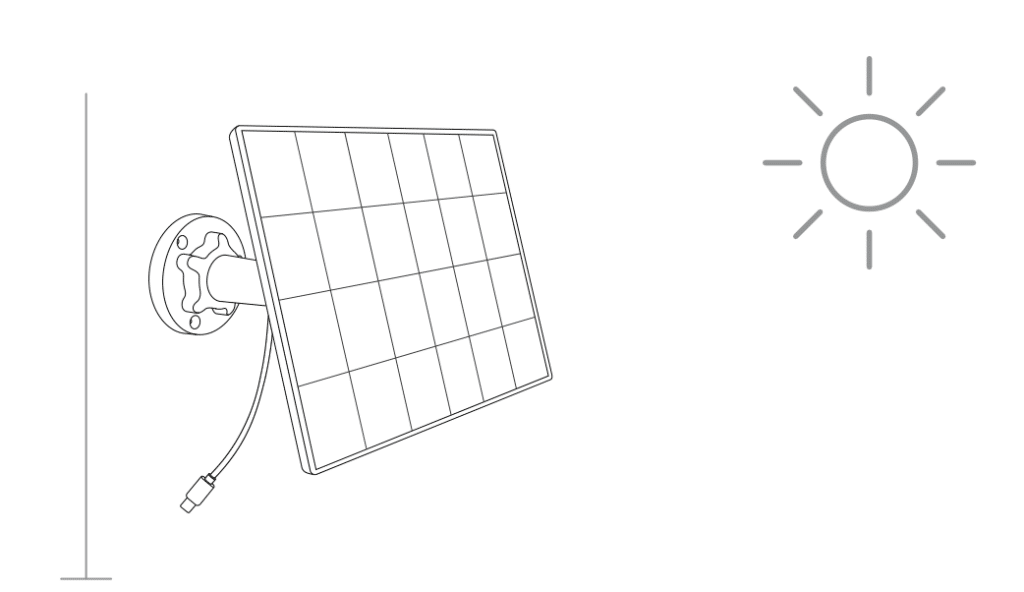
Step 1:
Find a good installation point and install the Solar Lite in a sunny location.
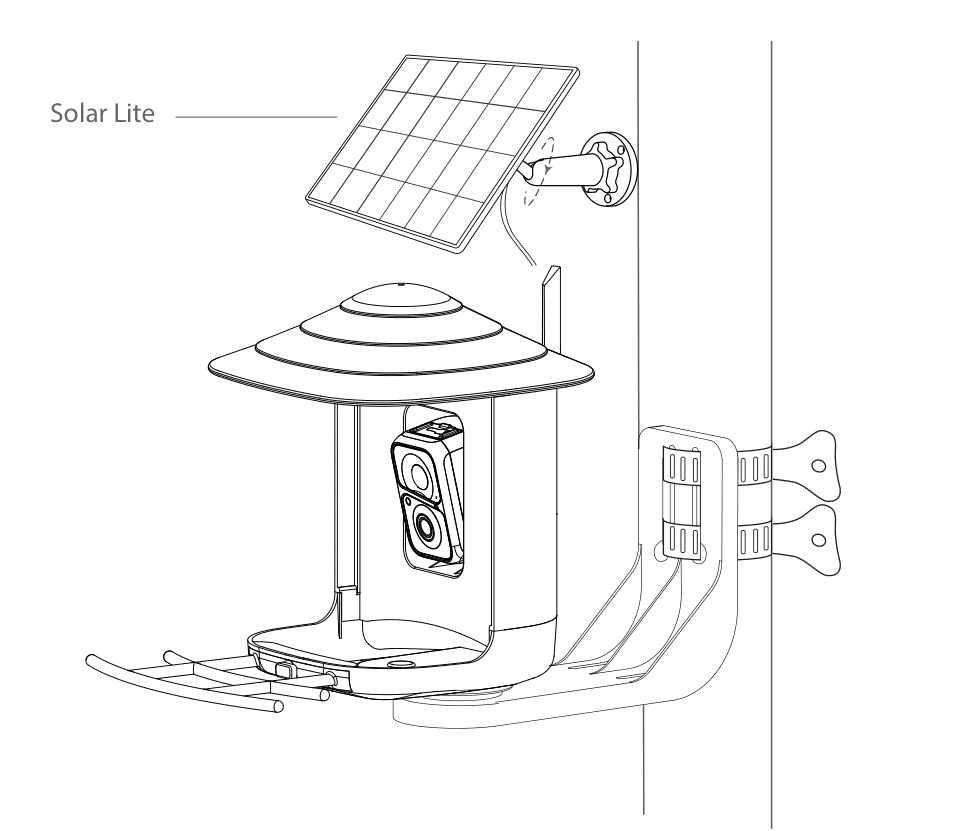
Step 5: Bird Feeder is installed and ready for bird watching.
Cleaning Bird Feeder

Step 1: Unplug the charging cable and put on the silicone cover.

Step 2: Using the Pull Tab on the base of the feeder, remove the Bird Feeder from the bracket.
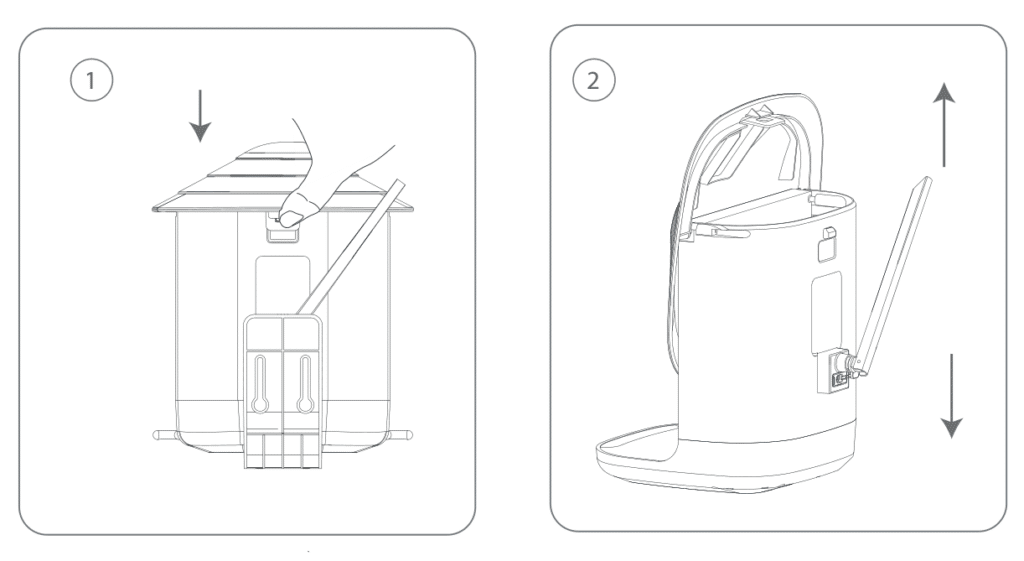
Step 3: Open up the buckle on the back of the Bird Feeder, and pull up on the roof to open.

Step 4: Pour water into the top of the seed reservoir. Do not wash the camera or any of its components. They are water resistant, not waterproof.
Dry the feeder, including the seed reservoir.
Step 5: Re-attach the Roof: Push the roof down and engage the snaps on the back of the Bird Feeder.
Step 6: Re-attach the bracket to the Bird Feeder base. Adjust the angle for both the Bird Feeder and camera.
Step 7: Open the silicone plug, re-plug in the Solar Lite.
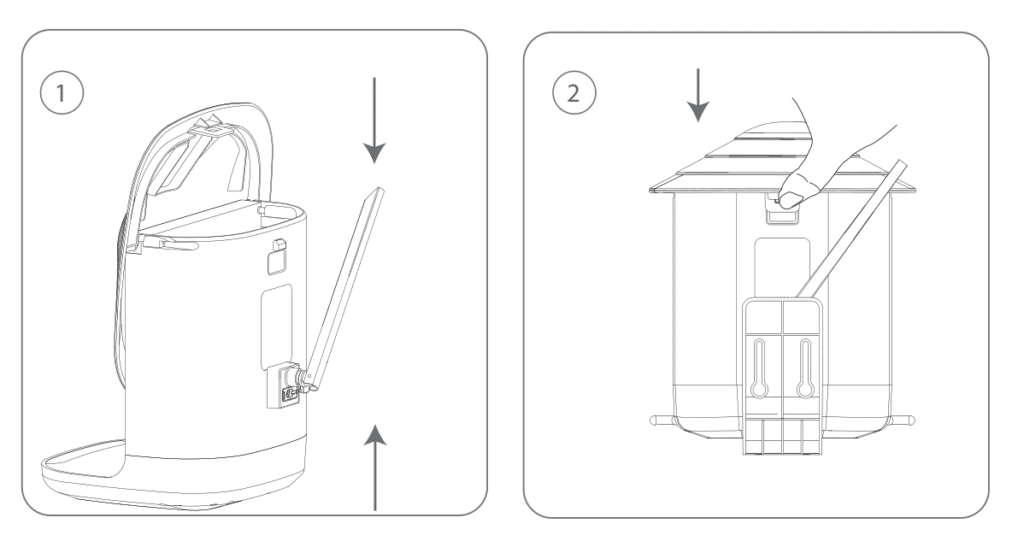
How to Add Bird Seed
Step 1: Open up the buckle on the back of the Bird Feeder, and pull up on the roof to open.
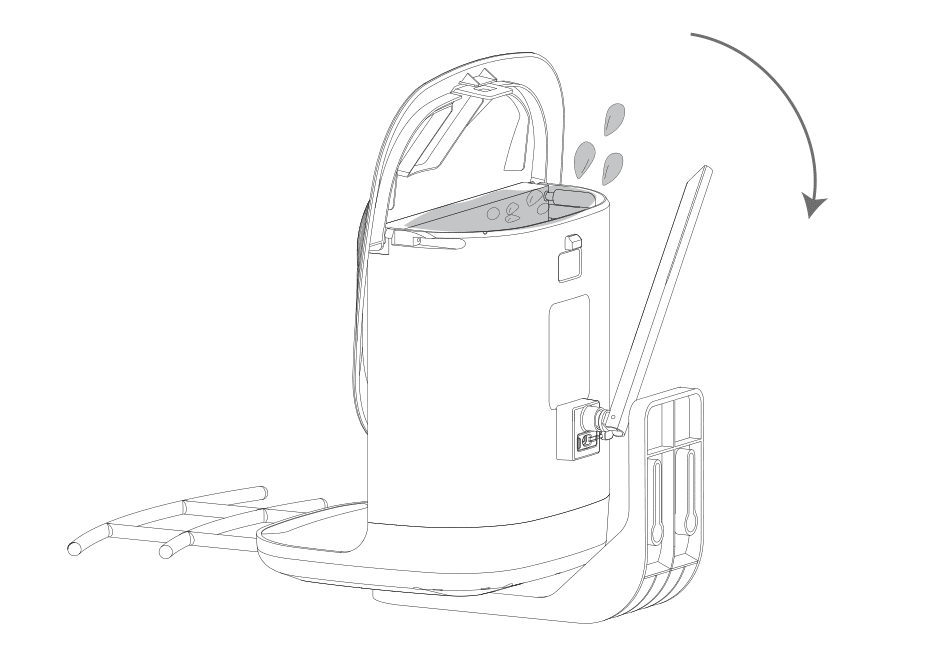
Step 2: You can add bird seed. Finally, close the roof back.
Status Light
This camera uses status light to communicate.
LED Indicator Status
| LED Indicator | Description |
|---|---|
| Solid Blue | Working |
| None | Sleep/Power Off |
| Solid Yellow | Charging |
| Solid Green | Charging Finished |
AI Bird Recognition
This service requires a subscription.
AI Bird Recognition has undergone massive machine learning and uses AI intelligent recognition algorithms to inform you in real-time “what species of bird are coming”, automatically save the bird images/video data for you and also provide bird knowledge learning and so on.
Do I need to turn off before charging?
not need